
Step-by-Step Guide: Installing Plugins in RISE CRM
Written by cijagani
Last updated
Download Plugin Zip:
📥 Head to CodeCanyon and download the Plugin zip file.

Unzip and Access Files:
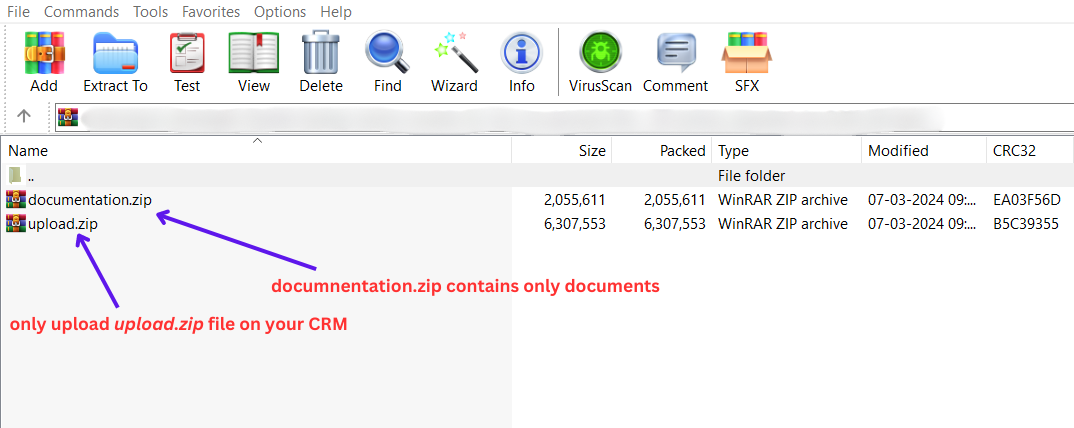
📦Extract the downloaded zip file, revealing two essential components: 'uploads' and 'documentation'.

Choose the uploads.zip file from the extracted folder and upload it on your crm.
Activate Plugin:
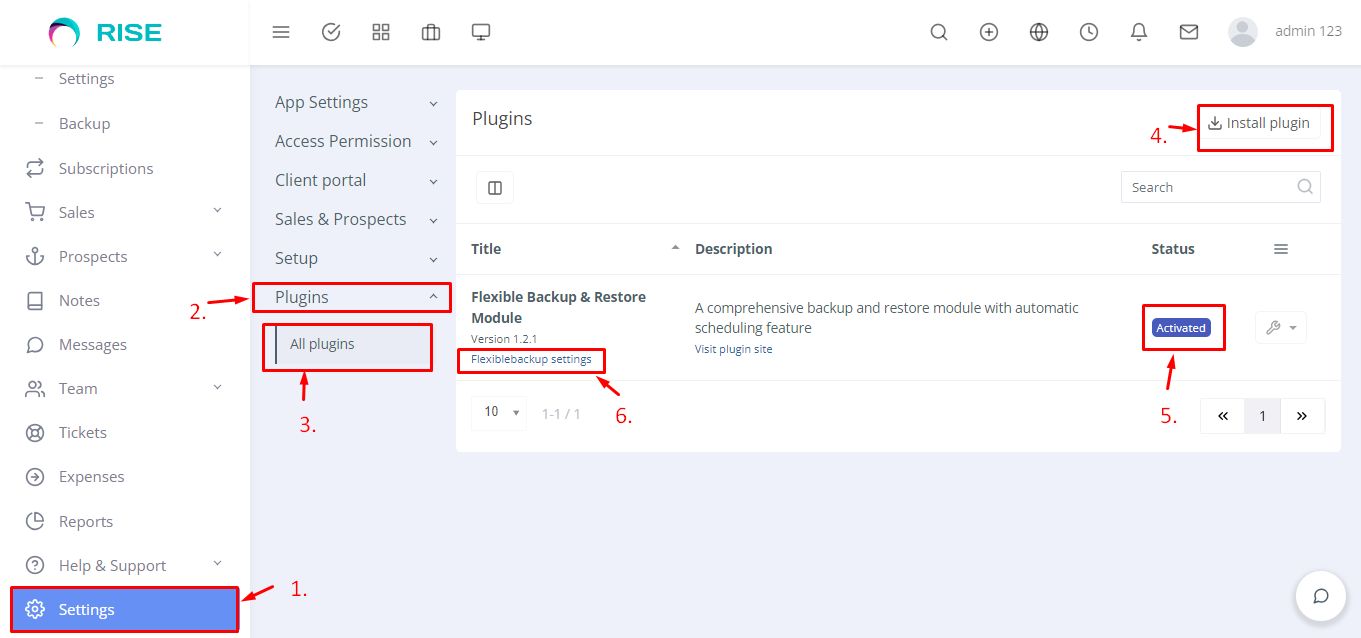
Access Setting: Go to the âš™ï¸ settings button.
Select Plugins: Choose "Plugins" from the settings menu.
View All Plugins: Click on "All Plugins" to see the list.
Install Required Plugins:

Install Plugin: Click "Install Plugin" ⬇ï¸
Upload Plugin:
📂 Open the popup page
📤 Upload your required plugin
Enter Purchase Code: 🔑 Enter the purchase code
Install: Click "Install" 🛠ï¸
Select Settings and Activate: 🔧 Choose "Settings" and click "Active."
Plugin Activation Confirmation: ✅ Your plugin is successfully activated.
Activate Plugins: Check your plugins are Activate.
Configure Plugin Settings: Click on plugin settings for each plugin as needed.
Completion:
🎉Congratulations! The plugin is now successfully installed and activated
You're all set to utilize its functionalities seamlessly.